What Size Art for a 10-Foot Wall: A Comprehensive Guide
That expansive 10-foot wall is staring back at you, a blank canvas brimming with potential. But the excitement quickly turns to apprehension. What size art do you even *beginto consider? Too small, and it’ll look like a lonely postage stamp. Too large, and it’ll overwhelm the space, turning your stylish living room into a cramped gallery. Choosing the right dimensions for your artwork isn’t just about filling space; it’s about creating harmony, balance, and visual impact. This guide is your roadmap to conquering that daunting wall and turning it into a stunning focal point.
Understanding Scale and Proportion
Before we dive into specific measurements, let’s discuss the fundamental principles of scale and proportion. These concepts are crucial for creating visually pleasing arrangements, no matter the size of your wall. Scale refers to the size of an object in relation to its surroundings. Proportion, on the other hand, describes the relationship between the sizes of different elements within a composition. Think of it like a well-composed photograph – everything needs to be in the right place, and of the right size, to create a balanced and engaging image.
The 2/3 to 3/4 Rule
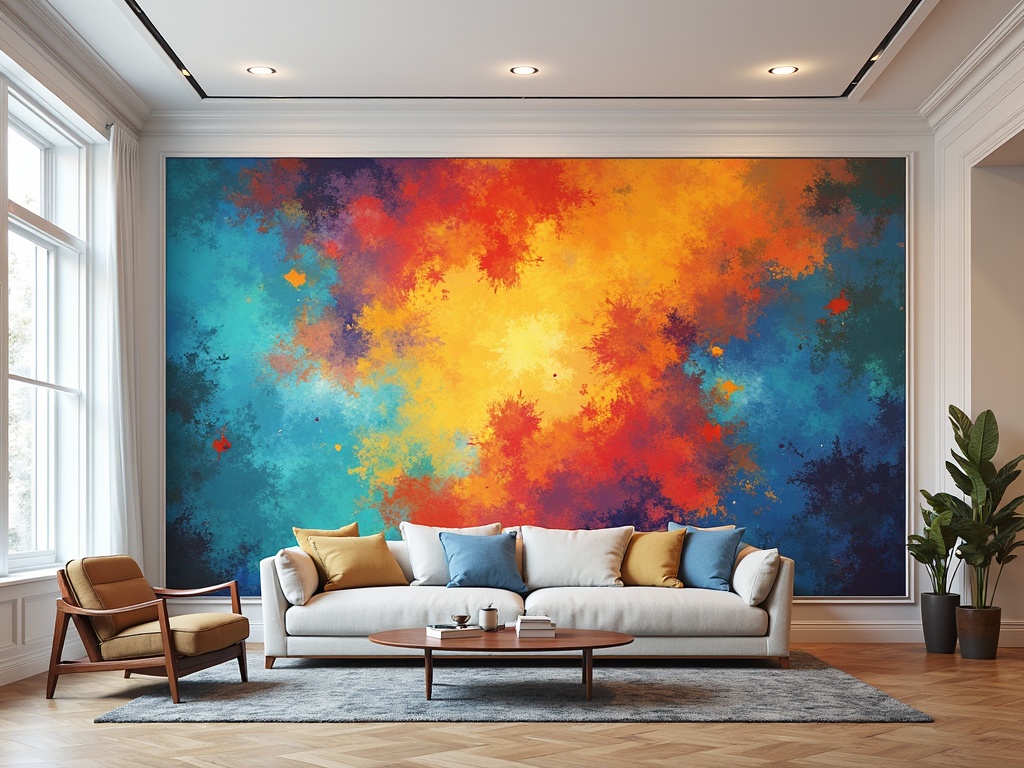
A good starting point is the 2/3 to 3/4 rule. This guideline suggests that your artwork (or the combined width of a gallery wall arrangement) should occupy roughly 66% to 75% of the wall’s width. For a 10-foot wall (120 inches), this translates to artwork that’s approximately 80 to 90 inches wide. This range provides a substantial visual presence without overpowering the space.
Considering Wall Height and Viewing Distance
While the width is essential, don’t forget about the height of your wall and the distance from which the art will be viewed. A taller wall can handle larger pieces, both in width and height. Similarly, if the art will be viewed from a greater distance, you can afford to go bigger. Conversely, in a smaller room where viewers are closer to the wall, a more modestly sized piece might be more appropriate. Generally, aim for the center of the artwork (or the center point of a gallery wall) to be at eye level, typically around 60-65 inches from the floor. This ensures comfortable viewing.
Single Statement Piece: Finding the Right Dimensions
A single, impactful piece of art can be a stunning choice for a 10-foot wall. It creates a focal point and simplifies the decorating process. But how do you determine the *exactright size?
Measuring Your Space Accurately
Before you even begin browsing for art, measure your wall *precisely*. Don’t just eyeball it! Use a measuring tape and note the width and height. Consider any architectural features, like windows, doors, or moldings, that might affect the placement and size of your artwork. Are there sconces already installed? You’ll want to factor those in.
Oversized Art: Making a Bold Statement
For a truly dramatic effect, consider oversized art. This generally means art that stretches nearly the entire width of the 2/3 to 3/4 range we discussed earlier. For a 10-foot wall, an oversized piece could be anywhere from 75-90 inches wide, and 48-72 inches tall, depending on the ceiling height and desired impact. Oversized art works particularly well in minimalist spaces where it can truly shine.
Sizing Down: When Less is More
While a large statement piece is often ideal, sometimes a slightly smaller piece can be equally effective, especially when paired with other decorative elements. A piece in the 60-75 inch range could work, especially if you plan to add flanking sconces, plants, or small consoles to anchor the space.
Gallery Wall Considerations: Creating a Curated Collection
A gallery wall is a fantastic way to showcase a collection of art and add personality to your space. However, planning a gallery wall for a large wall can feel overwhelming. Here’s a breakdown of key considerations:
Planning Your Layout: From Symmetrical to Eclectic
The layout of your gallery wall significantly impacts its overall aesthetic. Symmetrical layouts, with evenly spaced and sized pieces, create a formal and balanced look. Asymmetrical layouts, with varying sizes and spacing, offer a more relaxed and eclectic vibe. Start by laying out your artwork on the floor to experiment with different arrangements before committing to hanging anything on the wall.
Calculating Total Coverage for a Gallery Wall
Remember the 2/3 to 3/4 rule? This applies to gallery walls as well. The combined width of your gallery wall arrangement should fall within that 80-90 inch range for a 10-foot wall. Consider the spacing between the pieces when calculating the total width. A common spacing is 2-4 inches between frames.
Mixing Sizes and Orientations
The beauty of a gallery wall lies in its versatility. Don’t be afraid to mix different sizes, shapes, and orientations (portrait vs. landscape) of artwork. This creates visual interest and prevents the wall from looking too monotonous. You can anchor the arrangement with a larger piece in the center and then surround it with smaller pieces.
The Importance of Consistent Framing
While mixing and matching artwork is encouraged, maintaining a consistent framing style can create a sense of cohesion. Consider using similar colored frames or mats to tie the entire gallery wall together. Alternatively, you can opt for a more eclectic framing approach, but ensure there’s at least one element that connects all the frames, such as a similar material or finish.
Beyond Width: Considering Depth and Texture
The size of your artwork isn’t the only factor to consider. Depth and texture also play a crucial role in how art interacts with a space.
Framing and Matting: Adding Visual Weight
The frame and mat you choose can significantly impact the perceived size and presence of your artwork. A wide, substantial frame can add visual weight and make a smaller piece feel more prominent. Similarly, a generous mat can create breathing room around the artwork and draw the eye inward. Consider the style of your room when selecting frames and mats. A modern space might benefit from sleek, minimalist frames, while a more traditional space could call for ornate, decorative frames.
Textural Elements: Engaging the Senses
Think beyond flat, two-dimensional art. Incorporating pieces with texture, such as sculptures, tapestries, or mixed-media works, can add depth and visual interest to your wall. These elements can also help to break up the monotony of a large, blank wall. Consider the overall texture of your room when selecting art. A room with smooth surfaces might benefit from art with a lot of texture, while a room with already textured walls might be better suited for smoother pieces.
Practical Tips for Hanging Your Art
You’ve chosen your art, determined the ideal size, and planned your layout. Now it’s time for the final step: hanging your artwork. Here are some practical tips to ensure a smooth and successful installation.
The Artist’s Tape Method (and why it works)
Before hammering a single nail, use painter’s tape to mark the placement of your artwork on the wall. This allows you to visualize the arrangement and make adjustments before committing to permanent holes. Cut pieces of tape to the size and shape of your frames and arrange them according to your plan. Step back and assess the overall balance and composition. This is especially helpful for gallery walls.
Choosing the Right Hanging Hardware
Select hanging hardware that’s appropriate for the weight of your artwork and the type of wall you have (drywall, plaster, etc.). For heavier pieces, consider using D-rings and picture wire, along with heavy-duty hooks or anchors. For lighter pieces, self-adhesive hooks or picture hanging strips might suffice. Always read the weight capacity of the hardware to ensure it can safely support your art. It’s better to over-engineer this process than risk your art falling.
Maintaining Consistent Spacing
Use a level to ensure your artwork is straight and even. For gallery walls, use a measuring tape to maintain consistent spacing between the pieces. A laser level can be a particularly helpful tool for achieving perfectly aligned rows.
Common Mistakes to Avoid
Even with careful planning, it’s easy to make mistakes when choosing and hanging art for a large wall. Here are some common pitfalls to avoid.
Hanging Art Too High
This is perhaps the most common mistake. As mentioned earlier, aim for the center of the artwork (or the center point of a gallery wall) to be at eye level, typically around 60-65 inches from the floor. Hanging art too high creates a disconnect between the art and the viewer.
Ignoring the Room’s Style and Color Palette
Your artwork should complement the overall style and color palette of your room. Choosing art that clashes with your existing décor can create a jarring and unharmonious effect. Consider the colors, textures, and patterns in your room when selecting art. [internal_link] If you’re unsure, opt for art that features colors that are already present in the room.
Underestimating the Importance of Lighting
Proper lighting is essential for showcasing your artwork. Consider installing track lighting or spotlights to highlight your pieces. Avoid placing art in direct sunlight, as this can fade the colors over time. Also, be mindful of reflections from windows or other light sources. Matte finishes can help to reduce glare.
Final Thoughts: Trust Your Eye
While these guidelines provide a solid foundation for choosing the right size art for your 10-foot wall, remember that ultimately, the decision is a personal one. Trust your eye and choose art that you love and that speaks to you. Don’t be afraid to experiment with different sizes, layouts, and styles until you find something that feels just right. After all, the goal is to create a space that reflects your unique personality and style.