Creating a Gallery Wall with Mixed Media: A Comprehensive Guide
Forget sterile white walls and perfectly matched frames. It’s time to unleash your inner curator and transform your space with a dynamic, personalized gallery wall. But we’re not just talking about predictable prints here. We’re diving deep into the exciting world of mixed media, where textures collide, materials dance, and your unique story takes center stage. Think beyond photos and embrace the unexpected – the possibilities are as limitless as your imagination.
Why Choose a Mixed Media Gallery Wall?
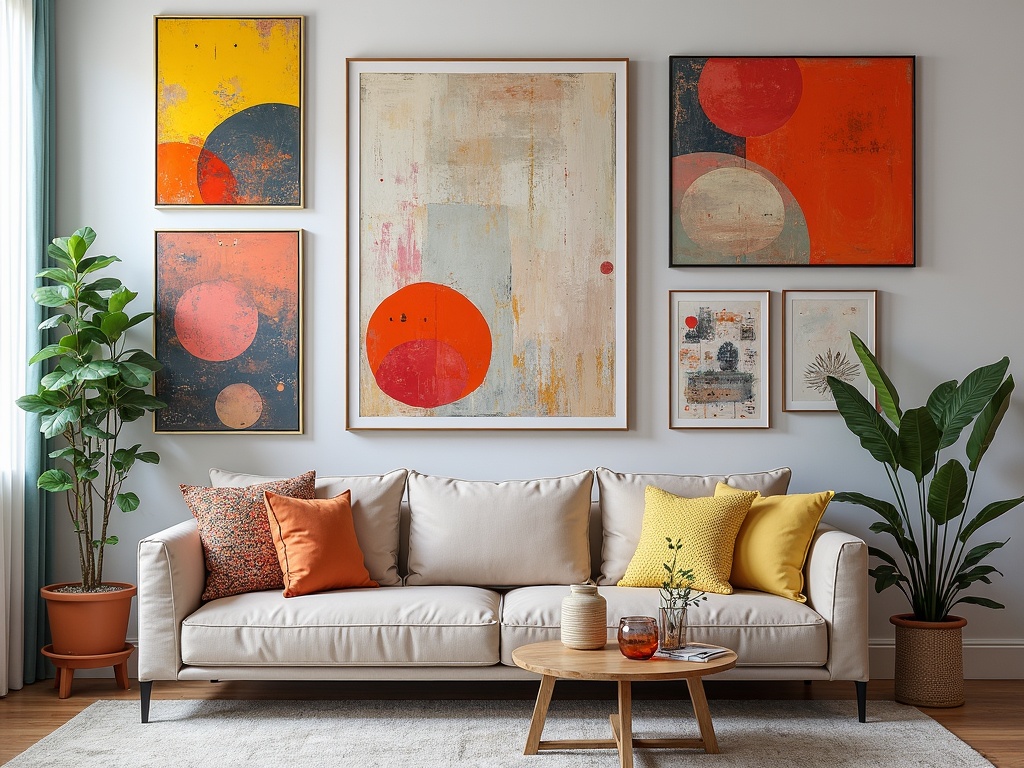
A mixed media gallery wall offers a richer, more engaging visual experience than a traditional, uniform display. It’s an opportunity to showcase your diverse tastes, interests, and artistic expression. Here’s why it’s a trend worth embracing:
- Personality Powerhouse: It’s a reflection of you. Forget cookie-cutter décor; this is your chance to tell your story through artwork, objects, and momentos.
- Visual Texture & Interest: Different textures and materials (think wood, metal, fabric, paper) create depth and prevent the eye from becoming bored.
- Conversation Starter: A well-executed mixed media wall is guaranteed to spark curiosity and conversation among guests.
- Adaptability: You can easily add, remove, or rearrange pieces as your tastes evolve, making it a dynamic and ever-changing display.
- Uniqueness: No two mixed media gallery walls are ever the same. Yours will be a truly one-of-a-kind masterpiece.
Planning Your Mixed Media Masterpiece
Before you start hammering nails into your wall, a little planning goes a long way. Here’s your roadmap to gallery wall success:
1. Define Your Style & Theme
What’s the overall vibe you’re going for? Consider your existing décor and choose a style that complements it. Some popular themes include:
- Bohemian Rhapsody: Eclectic mix of textures, patterns, and global influences. Think macramé, woven wall hangings, vintage photographs, and found objects.
- Modern Minimalist: Clean lines, geometric shapes, and a restrained color palette. Focus on quality over quantity. [internal_link]
- Industrial Chic: Raw materials like metal, wood, and concrete. Incorporate architectural blueprints, vintage machinery parts, and black and white photography.
- Coastal Calm: Seashells, driftwood, nautical charts, and paintings of seascapes. A palette of blues, whites, and sandy beiges creates a relaxed atmosphere.
- Vintage Charm: Antique maps, botanical prints, old letters, and framed textiles. Embrace the beauty of aged and imperfect items.
2. Gather Your Materials
Now for the fun part! Start collecting items that fit your chosen theme and style. Don’t be afraid to mix high and low – a thrift store find can look just as stunning as a piece from a high-end gallery.
Here are some ideas to get you started:
- Artwork: Prints, paintings, drawings, photographs (color and black & white).
- Textiles: Woven wall hangings, macramé, embroidered pieces, vintage scarves.
- Sculptural Elements: Small ceramic pieces, metal sculptures, wooden carvings, 3D printed objects.
- Mirrors: Different shapes and sizes to add light and dimension.
- Framed Objects: Pressed flowers, dried insects, vintage keys, postcards, stamps.
- Found Objects: Driftwood, seashells, feathers, interesting stones, vintage tools.
- Letters & Ephemera: Vintage letters, postcards, sheet music, maps, tickets.
- Personal Mementos: Travel souvenirs, family heirlooms, concert tickets, children’s artwork.
3. Consider Color Palette and Composition
While eclecticism is encouraged, establishing a cohesive color palette will prevent your gallery wall from looking chaotic. Choose a few dominant colors and use them throughout the display. Consider the existing colors in your room for harmony.
Think about the overall composition. Do you want a symmetrical arrangement, an asymmetrical design, or a free-flowing organic look? Experiment with different layouts on the floor before you start hanging anything.
4. Measure and Map It Out
Measure the wall space you plan to use. Use painter’s tape to mark out the general boundaries of your gallery wall. This visual guide will help you stay within your planned area.
Cut out pieces of paper in the same sizes and shapes as your artwork and objects. Use these paper mock-ups to experiment with different arrangements on the floor or on the wall using painter’s tape. This allows you to visualize the final result and avoid unnecessary nail holes.
5. Frame It Right
Choosing the right frames is crucial to creating a cohesive and visually appealing gallery wall. While you don’t have to match everything perfectly, consider the overall style and color palette.
Here are some framing tips:
- Mix and Match: Combine different frame styles, colors, and materials for visual interest.
- Consider the Artwork: Choose frames that complement the artwork, not overpower it.
- Matting Matters: Adding a mat around your artwork can give it more breathing room and make it stand out.
- Consistency is Key (Sometimes): If you’re using a variety of frame styles, consider maintaining a consistent color or material for a unifying effect.
Bringing Your Vision to Life: The Hanging Process
Now that you’ve planned your gallery wall and gathered your materials, it’s time to start hanging! Here’s a step-by-step guide to ensure a smooth and successful process:
1. Gather Your Tools
You’ll need the following tools:
- Hammer
- Nails (various sizes) or picture hanging hooks
- Level
- Measuring tape
- Pencil
- Painter’s tape
- Stud finder (optional, for heavier items)
2. Start with the Anchor Piece
Choose one central piece that will serve as the anchor of your gallery wall. This should be the largest or most visually striking item.
3. Work Outwards
Hang the anchor piece first, then start building outwards, placing other items around it. Maintain consistent spacing between the pieces – a good rule of thumb is 2-3 inches.
4. Use a Level
Use a level to ensure that each piece is hanging straight. There’s nothing worse than a gallery wall that’s slightly askew!
5. Embrace Asymmetry
Don’t be afraid to break away from perfect symmetry. An asymmetrical arrangement can be more visually interesting and dynamic.
6. Step Back and Evaluate
As you’re hanging, regularly step back and evaluate the overall composition. Make adjustments as needed until you’re happy with the result.
Mixed Media Magic: Specific Item Ideas
Need some more inspiration? Let’s delve into exciting mixed-media item ideas to elevate your gallery wall:
Floating Shelves as Part of the Wall
Integrate small floating shelves into your gallery wall design. They can hold lightweight sculptures, small plants, interesting rocks, or even tiny framed photos. It gives a 3D element that traditional frames can’t.
Fabric Art
Frame interesting pieces of fabric. This could be vintage scarves, pieces of embroidered cloth, or even textured burlap. The fabric adds a soft, tactile element to the wall.
Botanical Elements
Press and frame flowers or leaves. Arrange them compositionally or frame individual specimens. They bring a touch of nature indoors and instantly brighten up the space.
Metal Art
Metal can add an industrial or modern vibe. Framed vintage keys, small metal sculptures, or even reclaimed metal pieces can create an eye-catching display.
Mirrors
Mirrors, especially in interesting shapes, add depth and reflect light, making the space feel larger.
Handmade Paper Creations
Frame handmade paper, origami, or quilled designs. They bring a unique, artistic touch and showcase the artist’s skill.
Maps and Travel Mementos
Frame vintage maps, travel tickets, postcards, or even small souvenirs. These add a personal touch and tell a story of adventures.
Children’s Artwork
Frame your children’s artwork – it’s a fun and personal way to incorporate their creativity into your gallery wall.
Troubleshooting Your Gallery Wall
Even with careful planning, you might encounter some challenges. Here are some common issues and how to address them:
- Holes in the Wall: Don’t be afraid to make mistakes! A little spackle and paint can easily fix any unwanted nail holes.
- Uneven Spacing: Use a measuring tape and a level to ensure consistent spacing between your pieces.
- Too Much Clutter: If your gallery wall feels too cluttered, remove a few items to create more breathing room.
- Lack of Cohesion: If your gallery wall feels disjointed, consider unifying it with a consistent color palette or theme.
- Items are too Heavy: Use appropriate hanging hardware for heavier items, such as picture hanging hooks or stud finders.
The Final Flourish: Stepping Back and Enjoying
Congratulations! You’ve created a stunning mixed media gallery wall that’s a reflection of your unique personality and style.
Now, take a step back, admire your handiwork, and enjoy the visual feast you’ve created. Your gallery wall is a living, breathing work of art that will continue to evolve and inspire you for years to come.
Remember, there are no hard and fast rules when it comes to creating a mixed media gallery wall. The most important thing is to have fun and express yourself. So, go ahead, unleash your creativity, and transform your space into a personalized art haven!