Hanging art in your home can feel like a daunting task, but it’s really just about expressing yourself and finding what works for your space. Whether you’re looking to create a cozy atmosphere or showcase your unique style, there are plenty of creative ways to display your favorite pieces. Here are ten tips to help you hang art like a pro, making your walls a true reflection of you.
Key Takeaways
- Mix different styles and sizes for an eclectic gallery wall.
- Use unconventional items like vintage maps or window panes for unique displays.
- Clothespins and clotheslines can create a casual and flexible art display.
- Consider art ledges or floating shelves for easy swapping of pieces.
- Command strips make it simple to hang and rearrange without damaging walls.
1. Gallery Wall
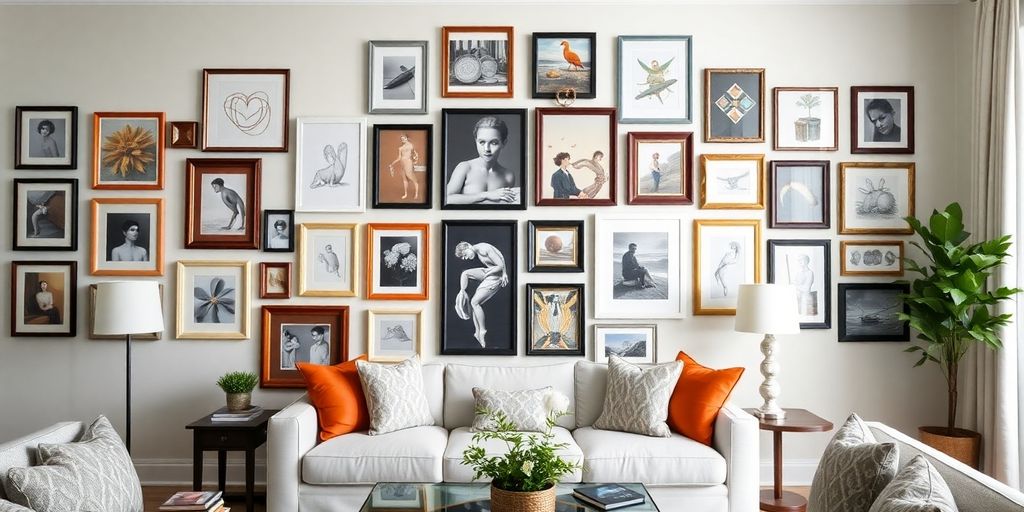
So, you want to create a gallery wall? Awesome! It’s a fantastic way to showcase your personality and add a unique touch to any room. I remember when I first tried this; I was so intimidated, but trust me, it’s easier than it looks. The key is to just start and not be afraid to experiment.
A gallery wall is essentially a curated collection of art, photos, and other decorative items arranged together on a wall. It can be symmetrical, asymmetrical, colorful, or monochromatic – whatever floats your boat! Think of it as a visual representation of your personal style.
Here are a few things I’ve learned along the way:
- Mix and match: Don’t be afraid to combine different frame styles, sizes, and art mediums. This adds visual interest and prevents the wall from looking too uniform.
- Plan it out: Before hammering any nails, lay out your arrangement on the floor. This allows you to play with different layouts and spacing without damaging your walls. You can even trace the frames on paper and tape them to the wall to get a better idea of the final result.
- Consider a theme: While it’s not necessary, having a theme can help tie the gallery wall together. This could be a color scheme, a subject matter (like nature or portraits), or a particular style (like vintage or modern).
One thing I wish I knew before starting my first gallery wall is the importance of consistent spacing. Aim for about 2-3 inches between frames for a cohesive look. It makes a huge difference!
Don’t overthink it! It’s all about having fun and creating something that you love. You can even add photo prints to make it more personal.
2. Picture Frames
Picture frames are a classic for a reason! They’re super versatile and can really make your art pop. Don’t think you’re stuck with just basic frames either; there are tons of ways to get creative with them.
- Mix and match frame styles for an eclectic look.
- Paint frames in bold colors to add a splash of personality.
- Use frames to create a cohesive gallery wall.
I remember when I first started decorating my place, I was so intimidated by the idea of hanging art. Frames felt like a safe bet, but I didn’t want things to look boring. So, I started experimenting with different frame colors and textures. It made a huge difference!
Consider using frames to display textiles or even pressed flowers. It’s a cool way to add some texture and visual interest to your walls. You can even find Umbra Exhibit Picture Frame Gallery Set to make the process easier. Plus, don’t be afraid to play around with the arrangement of your frames. Hanging them in a straight line or a grid can look super polished.
3. Vintage Maps
Okay, so hear me out – vintage maps aren’t just for geography classrooms anymore! They can seriously add a cool, worldly vibe to your space. I’m not talking about those boring, laminated ones either. Think aged paper, faded colors, and maybe even some cool old place names.
They’re surprisingly versatile and can fit into a bunch of different decor styles.
I remember finding this HUGE map at a flea market once. It was all ripped and faded, but it had so much character. I ended up framing it, and it became the centerpiece of my living room. Seriously, people always comment on it!
Here’s a few ideas to get you started:
- Statement Piece: Find one large map and frame it. Instant conversation starter!
- Gallery Wall Addition: Mix smaller maps in with your other art for an eclectic look. A vintage map gallery wall can really tie a room together.
- DIY Projects: Use maps to decoupage furniture or create unique wall hangings. Get crafty!
Don’t be afraid to get creative with how you display them. You can even tear them up and use them in collages. The possibilities are endless!
4. Window Panes
Old window panes? Don’t toss them! They’re surprisingly versatile for displaying art. I found a few at a flea market last summer, and they’ve become a real conversation starter in my living room. It’s a fun way to add a touch of vintage charm to your space.
Using window panes is a great way to display art, especially if you’re going for a rustic or farmhouse vibe. They add character and can be easily customized with different colors and finishes.
Here’s how I’ve used them:
- Photo Display: Clip photos to the panes with tiny clothespins.
- Pressed Flowers: Sandwich pressed flowers between two panes.
- Chalkboard Art: Paint a pane with chalkboard paint for a reusable art surface.
To hang them, I recommend using heavy-duty picture hangers. They’re strong and will keep your window pane art securely on the wall. Also, consider adding D-rings to the back of the frame for extra stability. Trust me, it’s worth the effort to make sure they’re hung safely!
5. Clothespins
Okay, so maybe you’re thinking, "Clothespins? Really?" But hear me out! This is a super fun and unexpected way to display art, photos, or even postcards. It’s all about getting creative and thinking outside the box. Plus, it’s budget-friendly, which is always a win!
Here’s the deal: you can string up some twine or wire across a wall, and then use clothespins to clip your artwork to it. It’s like a mini art gallery that you can constantly change and update. You can even paint or decorate the clothespins to match your room’s decor. How cool is that?
I remember when I first tried this in my apartment. I had a bunch of travel photos that I wanted to display, but I didn’t want to commit to frames. So, I strung up some fairy lights and used clothespins to hang the photos. It looked so cozy and inviting!
Here are some ideas to get you started:
- Photo Garland: String up photos from a recent trip or event.
- Inspiration Board: Clip up quotes, sketches, and other things that inspire you.
- Kids’ Art Display: Show off your little one’s masterpieces in a fun and accessible way. You can even create a carrot wall art for spring!
Clothespins aren’t just for laundry anymore! They’re a versatile and affordable way to add some personality to your walls. So, give it a try and see what you can create!
6. Plate Collections
So, you’ve got some plates. Maybe they’re vintage, maybe they’re from a trip, or maybe they’re just…plates. But did you know they can be art? Seriously! Hanging plates can add a unique, unexpected touch to your walls. It’s way more interesting than just sticking them in a cabinet, right?
Plate collections can be a fantastic way to showcase your personality and add a touch of whimsy to any room.
Here’s the thing: it’s not as hard as it looks. You don’t need to be a professional interior designer to pull this off. Just a little planning and some good hanging hardware, and you’re golden.
Think about the story you want to tell with your plates. Are they all the same style? Different colors? Do they have a theme? This will help you arrange them in a way that looks cohesive and intentional.
Here are some ideas to get you started:
- Mix and match different sizes and shapes for an eclectic look.
- Create a symmetrical display for a more formal feel.
- Use plates with different patterns and colors to add visual interest.
- Consider the spacing between the plates. Too close, and it looks cluttered. Too far apart, and it looks disjointed.
- Don’t be afraid to experiment! There’s no right or wrong way to do this. Just have fun with it.
Before you start hammering away, it’s a good idea to plan the arrangement on the floor first. This way, you can play around with different layouts and see what looks best before you commit to anything. Trust me, it’ll save you a lot of headaches (and nail holes) in the long run.
7. Command Strips
Okay, let’s talk about Command Strips! If you’re like me and hate putting holes in your walls, these things are a lifesaver. They’re super easy to use, and you can find them pretty much anywhere. Plus, they’re great for renters or anyone who likes to change up their decor often. Just make sure you get the right size for the weight of your art – that’s key!
Here’s the deal with Command Strips:
- They stick to the wall without nails or screws.
- They come off clean (most of the time, anyway).
- They’re perfect for lightweight frames and posters.
I’ve used Command Strips in every apartment I’ve ever lived in. They’re perfect for hanging lightweight frames without damaging the walls. Just be sure to follow the instructions carefully, and you’ll be good to go!
One thing I’ve learned is to really clean the wall before you stick the strips on. A little rubbing alcohol can make a big difference. Also, don’t overload them! Check the weight limit and maybe even go a little under just to be safe. I’ve had a few things come crashing down when I got too confident. You can even use painter’s tape to help you visualize where you want to hang your art before you commit with the strips. Trust me, it saves a lot of headaches!
8. Art Ledges
Art ledges are a super cool way to display your favorite pieces without committing to nails in the wall. Plus, you can easily switch things up whenever you feel like it! It’s like having a mini-gallery that you can curate on a whim. They’re also great for smaller spaces where you don’t want to overwhelm the walls with too much stuff. Let’s explore how to make the most of them.
- Mix and match frame styles: Don’t be afraid to combine different frame colors and materials for an eclectic look.
- Overlap your art: Layering pieces adds depth and visual interest. Try placing smaller frames in front of larger ones.
- Add some objects: Incorporate small sculptures, plants, or decorative items to break up the monotony of just pictures.
Art ledges are a fantastic solution for renters or anyone who likes to change their decor frequently. They offer flexibility and style without the commitment of traditional hanging methods. You can find ledges in various sizes and materials to match your aesthetic.
Consider the height at which you install your art ledge. You want it to be at a comfortable viewing level, so that you can appreciate your art without straining your neck. Also, think about the overall balance of the ledge. You don’t want it to look too cluttered or too sparse. Play around with different arrangements until you find something that feels just right. For a fresh and curated look, incorporate a variety of artwork styles, such as abstract pieces, minimalist line drawings, and soft textures.
Art ledges aren’t just for art, either. They can also be used to display books, records, or any other small items that you want to show off. Get creative and have fun with it! Experiment with different textures and colors to create a display that reflects your personality. You can even add some fairy lights for a touch of whimsy. The possibilities are endless!
9. Floating Shelves
Floating shelves are a fantastic way to display art without committing to nails in the wall. They offer flexibility and a modern look. Plus, you can easily switch things up whenever you feel like a change. It’s like having a mini-gallery that you can curate on a whim!
Floating shelves are super versatile and can work in almost any room.
Here’s why I think they’re great:
- They’re easy to install (most of the time!).
- They come in tons of styles and materials.
- You can use them for more than just art – think books, plants, and decorative objects.
I love using floating shelves because they give a clean, minimalist vibe. It’s a great way to showcase your favorite pieces without making the space feel cluttered. Plus, you can always rearrange them to create a fresh look.
Consider the weight capacity of your shelves before loading them up with heavy items. You don’t want any unexpected shelf collapses! Also, think about the spacing between shelves to create a visually appealing arrangement. You can find top floating shelves with different features to match your style.
10. Wall Decals
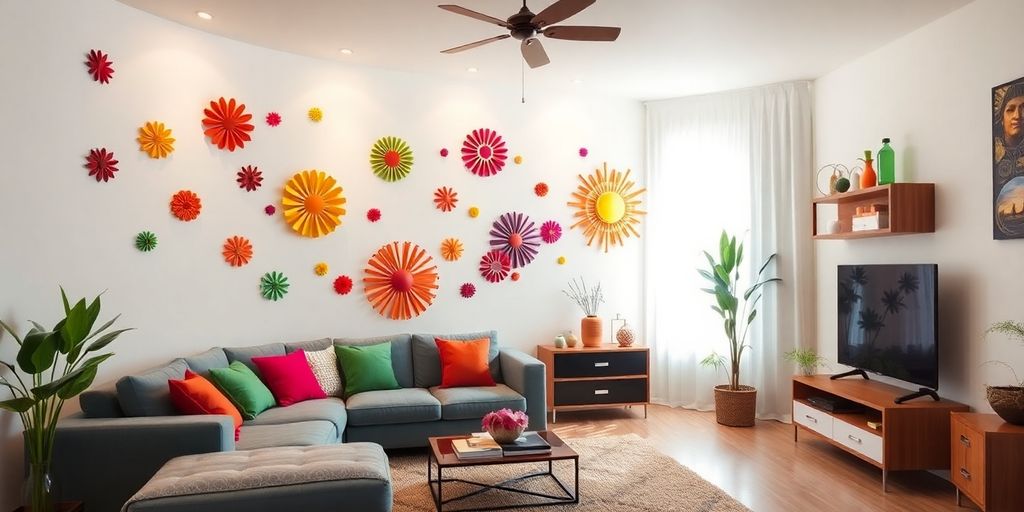
Wall decals are a super fun and easy way to add some personality to your walls without the commitment of paint or nails. Seriously, if you’re renting or just like to change things up often, these are a game-changer. They’re basically stickers for your walls, but way cooler.
Think of them as temporary tattoos for your home. You can find them in all sorts of designs, from simple geometric shapes to full-on murals. Plus, they’re usually pretty affordable, which is always a win.
Here’s why I think they’re awesome:
- Easy to apply: Most decals just peel and stick. No special tools needed!
- Removable: When you’re tired of them, just peel them off. No damage to your walls (usually!).
- Versatile: They come in tons of styles, so you can find something that fits your vibe.
I remember when I first tried wall decals. I was so nervous about messing it up, but it was surprisingly easy. I ended up creating a whole curated gallery walls in my living room with different patterns and quotes. It looked amazing, and when I moved, I just peeled them off and took them with me!
Wall decals can really transform a space. They’re perfect for adding a pop of color, a fun pattern, or even just a little bit of whimsy. So, if you’re looking for a quick and easy way to spruce up your home, give them a try!
Wrap-Up: Get Creative with Your Art Hanging
So there you have it! With these ten tips, you’re all set to hang your art like a pro. Remember, it’s all about having fun and making your space feel like home. Don’t stress too much about getting it perfect—art is meant to be enjoyed, not just admired from a distance. Mix and match styles, play with heights, and let your personality shine through. Whether you’re going for a gallery wall or a simple piece above the couch, just make sure it reflects you. Now grab that hammer and get to work! Your walls are waiting for some love.
Frequently Asked Questions
What is a gallery wall?
A gallery wall is a collection of different pictures or art pieces hung together on one wall. It can include photos, paintings, and other art to create a unique display.
How do I choose the right picture frames?
When picking frames, choose ones that match your style. You can mix different styles or stick to one type for a more uniform look.
Can I use vintage maps as art?
Yes! Vintage maps make great wall art. You can hang them by mounting them on a dowel or framing them.
What are window panes used for in decor?
Window panes can be used to display art or photos. You can tape pictures onto the panes for a creative look.
How can I hang art without damaging my walls?
You can use Command strips or hooks that are removable. They hold art well and won’t leave marks when you take them down.
What is an art ledge?
An art ledge is a narrow shelf where you can place art pieces instead of hanging them. It allows you to easily change the display whenever you want.